Ad Space For Rent

The Town Accentric: The Food Blog! is now selling Ad Space. Email me at backporchspiceco@ gmail.com for more details.

Sunday, July 29, 2012

Attack of the Killer Tomatoes

A Well Used Cauldron 
I've been waiting to use that title for a while now.  WKBD TV50 in Detroit used to play Godzilla movies every Saturday and as I got older I realized that the 50's was a decade of truly awful monster movies that had had redeeming value as being so absurd as to be comical.  And, to be perfectly honest, I think it was more the serious and operatic tone of the theme song which cannot be described.  You just have to hear it.  A story which really has nothing to do with this weeks installment except that I am taking full advantage of the Tomato Season while it's here and the title seems fitting as I have processed about 50 lbs. of tomatoes in the last 3 weeks.


I've explained that I've made about 2 gallons of Chili Sauce, and I am sorry but I will still not be letting that cat out of the bag.  Instead, I have two quick recipes and since I am cooking one of them as I write this and am a little pressed for time.


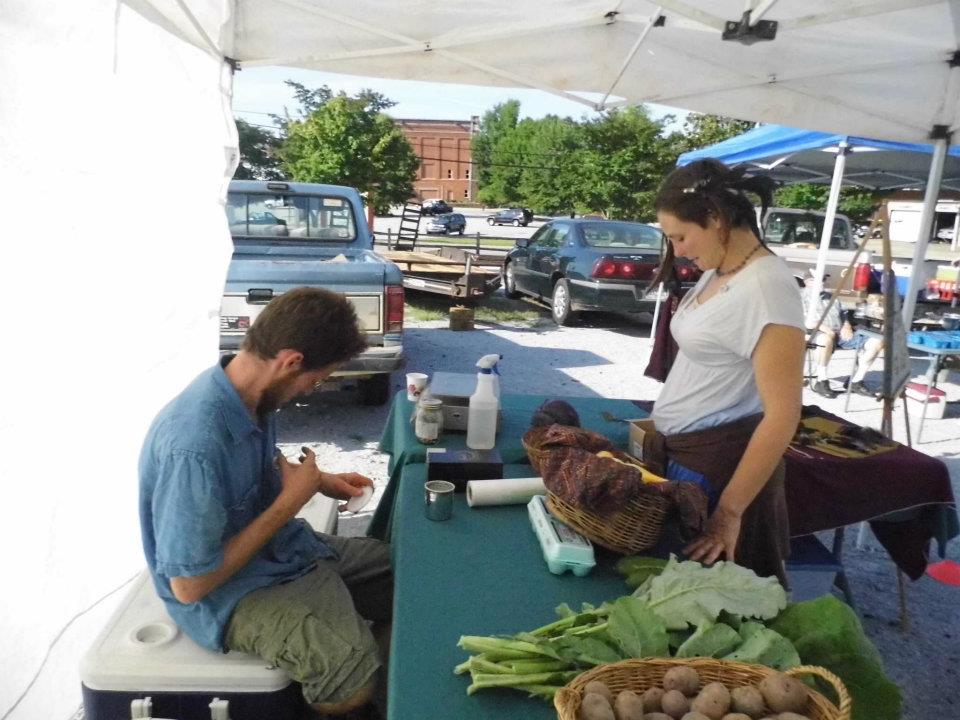
Before I forget, this is the last week of the West Georgia Locavore Challenge and Props go out to the Garry Farm for some seriously over ripe tomatoes that are perfect for what I'm writing about today as well as The Crager/Hager Farm for the Paste tomatoes, and Full Life Farms for some of the most beautiful and flavorful Roma Tomatoes I've ever tasted.


Tomato Paste and Conserva
Tomato Sauce
A Simple Meatball Recipe


Both of these recipes are from scratch so it would be well to explain the blanching of tomatoes, which is quite simple.  Set a large pot of water to boil with enough water to fully submerge your largest fruit and have a bowl full of ice water and an empty bowl large enough to hold all of the blanched tomatoes.  Simply submerge one or two tomatoes at a time in the boiling water until the skin begins to split, immediately dunk it in the ice bath to stop the cooking process, and place the cooled units in the extra bowl kept handy.  When ready, cut the top out and the rest of the meat should pop right out.  If not, it should be very easy to peel.  Also, boil the skins for a few in the juices from the bottom of the cold 'mater bowl.  That will dislodge any meat that might have clung to the inside of the skins.


To the seasoned cook, this may sound elementary but I know people that read this that may not have taken this route before and I always like to inform everyone of how to get the job done.


Tomato Paste and Conserva


A ton of recipes call for Tomato Paste and I always buy the stuff in the toothpaste style tube.  This year, I decided to make my own supply and, although I ended up with less than I thought, I still have a wonderful, flavorful Tomato Paste that beats the store bought stuff by far.


12 lbs. Very ripe Paste or Roma Tomatoes, blanched
2 bay leaves,
2 tsp coarse Sea Salt
5-7 hours of your life you're not going to get back


Place all tomatoes in a heavy bottom pot large enough to hold all of the tomatoes and crush them up with your hands.  Add salt and bay leaves and simmer, covered, for about 30-45 minutes.  At this point, you're going to want to use either a blender or a stick blender (my choice) and blend the mixture to break up the meat of the tomatoes.  If you're using  a stand blender, pulse it instead of turning it on Puree.  The point here it is break up the meat to get it through a medium sieve while leaving the seeds behind.  The seeds will eventually cook out or you could puree them in but they leave a bitter, metallic taste behind that it the sure sign of someone who was in a hurry with their tomatoes.  Of course, the long, drawn out explanation above can be shortened with a food mill that has a medium screen on it.  However, I am much closer to being an Impoverished Chef as opposed to a Pampered one, a food mill hasn't been in the cards.


Once the puree has been sieved, return to the pot and turn on a medium setting and begin to reduce, stirring very often.  As it begin to reduce down and get thicker, turn the heat down and stir just as often.  This is more of a project of love than it is something you can check back on.  This is not a nappy day project.


After a few hours, it will begin to thicken more until the point where it can longer be stirred and simply "piles up" around the spoon as you try.  12 lbs of tomatoes should have yield you about 2-2 1/2 cups of super tomato concentrate. When cooled, you can either can it, place it in zip top bags and freeze it (my method), or you can place it in a sterilized jar while very hot and cover it with about 3/4" of olive oil.  I've tried this method before with other things and it seems to work really well for preserving high acid foods for long periods of time in the fridge.


Tomato Conserva


This is a semi-simple method to take your paste just a little farther.  Simply spread the paste on a cookie sheet and place in an over at around 200 degrees or lower and let dry/concentrate for another 30-60 minutes, of course, while watching it closely.  When the edges start to caramelize and turn a dark brown you're about done.  Again, storage is up to you.


Tomato Sauce (Marinara) 


Just my simple little recipe for a knock out Marinara.


20-25 large, very ripe Tomatoes, blanched
1 cup Carrot, finely diced
1 1/2 cups Sweet Onions, finely diced
1 1/2 cups Celery, finely diced
1 1/2 cups Green Pepper, finely diced
5-6 cloves Garlic, finely diced
1 cup Dry Red Wine
1 tsp each, Oregano, Thyme, Basil
1/2 tsp Red Pepper Flakes
Sea Salt and Pepper to taste


Instead of breaking up the tomatoes with your hands, cut them in half and try to remove as much of the seeds and middle liquid as possible.  If a little bit of one or the other gets in the sauce, it's no biggie. Now you can break them up with your hands in the pot.  In a large skillet, saute all the aromatics (garlic, onions, pepper, and carrots) until translucent and the edges are just starting to turn brown.  Add this to the pot and simmer until thickened.  If your sauce doesn't really have that rich depth of tomato flavor, add about 2 tbsp of the paste that you just made.


This base recipe has a thousand and more variations.  Add browned ground beef, pork, or lamb (or all three) and simmer until the meat disappears and you have a simple Ragu.  Cook the base Marinara or the Ragu down until quite thick and you have a top notch pizza sauce.  One way or another, this little recipe can go far and if you make very large batches it will can or freeze well.


A Simple Meatball Recipe


I tinkered with meatballs for years and never could seem to get them right.  I either over handled them, didn't season them quite right, or they were dry, dry, dry.  However, by listening to a few people and repeated trial and error, and realizing that I could add fat (thereby adding moisture) into the recipe with Heavy Cream.  Tis is what I came up with.....


1 lb. Ground Beef
1 lb. Ground Pork
1/2 cup Italian Bread Crumbs
1/4 cup Heavy Cream
1/4 cup Sweet Onion, very finely diced
2 cloves Garlic, very finely diced
1 Egg (optional)
Sea Salt and Pepper to Taste


Start with .allowing the bread crumbs to soak in heavy cream until completely absorbed.  Saute the onions with salt and pepper until they just begin to brown and caramelize, remove from heat and allow to cool. Blend all the ingredients just until combined, being very careful not to over handle.  A


Form into 1 1/2" balls and brown in a frying pan, turning to brown as much of the meatball as possible.  Don't worry about cooking them all the way through.  You can either finish them in the over at about 325 degrees for 10-15 minutes, or do as I do and let them finish cooking in Marinara sauce.


To be honest, there have been some rather significant changes in my life this week and I have been very busy and lazy all at the same time.  Having said that, I really don't feel like going through the process of writing about homemade pasta.  I also don't feel like going through the motions of making homemade pasta, so I'll leave that for another post.


For now, I'm headed to the store to buy some pre-made pasta, eat some Italian for the night, and chill out.  Tomorrow comes a new day and there are many things to be done.  Watch out, Back Porch Spice is on the rise.  And always.........


Party Well, Eat Better,
Rob


Sunday, July 22, 2012

A Fun Little Story Then Some Food

Google still hasn't fixed the background issue with the text.  Bear with me and my patches......

The Fun Little Story

I am a writer.  When a writer has a story inside then, they have to let it out.  Therefore, you may want to skip the first few paragraphs as it's just a story.  It has a moral and purpose, but if you want to cut to the chase, I completely understand.

You may remember from last weeks post, 24 Hours of Food, that I took a ton of time in the kitchen recreating an old recipe of my Grandmothers, who just turned 90 years old.  It's called Chili Sauce and, although it tastes nothing like chili, it was a huge part of my childhood and all of us kids still talk about it as if it were Gossamer, a mythical and unattainable goal.  Having succeeded, I asked Gina to get some good quality hot dogs for dinner.  After grilling some really tasty wings (there's a Blog Post for that) I added a few dogs to the fire, topped them with Chili Sauce and took a bite.

I almost cried it was so good.  It was an instant transport back to Fenton Rd. and eating Koegel Hot Dogs topped with a sauce that I hadn't tasted in almost 20 years.  I tried to explain it and even got Gina and Andrew (who never try anything) to taste it.  They were less than impressed but seeing that I could barely contain myself, Gina told me to call Grandma and tell her about it.  I didn't even finish my dinner and I was on the phone.  I told Grandma of the toil, the tasting, the adding, the tasting again, and the 5 hours I spent over the stove tending and cooing as if I were watching an infant child.

....and then I got to the Green Peppers.....

Though the story had, to this point, been filled with congratulatory comments, laughs, and chuckles of pride in my accomplishment, I had mentioned that one of the ingredients was finely diced Green Peppers.  Grandma said "Oh.  I would have never added Green Peppers to mine.  I don't care for the taste of Green Peppers".  Throughout the rest of the conversation the comments were a much more civilized version of "I'm glad you like it...even if it's not like mine".  Now, anyone else that had spent so much time pondering the aromas and flavors of such a condiment and spent countless hours tending to this attempt would have been crushed.  However, knowing Grandma, I finished the conversation, which was one of the best we've had in years, I told her I loved her, hung up the phone, and proceeded to laugh uncontrollably for the next 15 minutes.  I then called my Mother and told her the story as I tell it to you...and she laughed her butt off too.


There's a post I put up a few months back called Technique/Good Riddance in which I explained my passion for cooking and making double damn sure it's done right...First Time, Every Time.  I laughed because, although my love of food and eating great things came from my Father, I now understand where that anal retentive passion for perfection comes from. God Bless you, Grandma.  Your not so subtle way if kicking me in the ass has amounted to something.  Something really tasty.


Before this tale comes to an end I get on with this weeks recipes:  1) I have an all new recipe for Chili Sauce that is no less than a culinary masterpiece, even if it's not EXACTLY like Grandmas.  2)  I'll type the recipe out and take it with me in the casket.  You want it?  Get a shovel. 


Some Food


As I promised and signed my name to, the West Georgia Locavore Challenge is going until the end of July and I promised that I would buy and eat as much local as I could.  This is the easiest Challenge I've ever signed on for.


The Farmers Market visit was just awesome this week.  Thanks to Paul at Full Life Farms for the tomatoes, this weeks batch of Chili Sauce will go over without a hitch.  After that, Brian Hager and Wendy Crager supplied the Yard Long Beans, Garry Farms provided Blue, Red, an Purple Potatoes, and Hembree Lane Farm, a newcomer to The Cotton Mill Farmers Market, provided some exceptional young Green Beans. 


On with the show......


I can't remember where I got the chicken but I know I got it at Farmers Fresh CSA some time ago and have had it frozen for a bit.  it's freakin' huge and it's natural.  That's all I need to know.  I get the grill ready with a batch of hot coals and, since I was a dope and accidentally threw my Apple Chips across the yard (don't ask how) I had to use a piece of oak wood I keep for the back porch fire pit.  And then I did this......


Slow Smoke Roasted Chicken


1 large Roasting Chicken
1 Fuji Apple cut into chunks
1 Vidalia or other Sweet Onion cut into chunks
Olive Oil
Coarse Sea Salt
Fresh Cracked Black Pepper
Granulated Garlic
Granulated Onion
Paprika
Butchers Twine

Start with rinsing the bird and patting it dry.  Toss the apple and onion chunks in olive oil, about 1/2 tsp salt and 1/2 tsp cracked pepper and stuff equal parts apples and onions into the cavity.   Whenever I stuff a bird for the grill, this is always what I use.  It imparts a certain sweetness to the meat and helps it stay very moist. Using a short length of butchers twine, tie the leg ends together to help keep the stuffing in.  Using another length, simply tie around the bird to keep the wings next to the body.  For those that aren't familiar with the term, this is Trussing.

Rub the entire bird with olive oil and season with coarse sea salt, cracked pepper, granulated garlic and onion, and a very light dusting of paprika.  Place on a piece of heavy duty aluminum foil large enough to hold some of the juices that will flow as the bird cooks.

At this point, it is up to you how fast you roast the bird.  However, I place it well away from the fire in the grill while simply laying a large piece of oak on the coals, closing the lid and letting it go until I hit an internal temperature of about 175 degrees, which takes about 3-4 hours.  When you hit whatever temp you like, carefully take the bird and the foil full of juices off the grill and wrap in enough heavy duty foil to go around the bird twice.  It will take some skill to get the juices in there as well but when you do, let the bird sit for about 15 minutes to finish cooking and to absorb some of the fine, smoky fats and drippings.  Sorry I didn't take a picture of this part.  It was getting late.

Needless to say, if you tent the bird and leave it longer in the pit, it will get more and more tender.  However, for those that aren't pit masters (and I truly am not) you have to dance a fine line between when the bird gets to fall apart tender and when it starts to dry out.  The onions and apples help to prevent this but there is always the chance of overdoing it.

Potatoes, Beans, and a Note About Salt

Gina does like green beans but the way she prefers to have them is sauteed with bacon, onions and potatoes.  I'm not going to type out a long, drawn out recipe for pan frying potatoes in bacon fat until golden brown and then adding onions and green beans and sauteing until they're done.  I will, however, offer this:

  • When you add the green beans, do it over a high heat so that they get a few char marks on them.  It tastes great and looks great as well.
  • I do green beans until they just begin to wilt and wrinkle because I like a little crunch.  However, do them the way you like.
  • Don't add salt until put the beans on the serving platter.  It helps keep the beans crunchy, the salt is not going to penetrate that much anyway, and it makes a great presentation seeing the shiny beans with course grains of salt.
  • When you do add salt, get creative.  I like to use Black Lava Salt because it looks great and has an interesting twang.  However, Pink Himalayan or Scottish Smoked both have wonderful flavors.  The point is, use some salt creativity to make them look great.
  • Finally, if the season is right, you can find some of those great potatoes that are pink, blue, or purple all the way through.  Not only do they look really cool, they have great flavors that you wouldn't expect.
I'd like to take a minute and talk about salt.  I was under the impression, for years, that salt was salt.  Good, old fashioned Iodized Morton's was all I used because it was all I knew.  Then I started paying attention and realized that every salt from every region of the World in gloriously unique.  Pink Himalayan has a wonderfully mild flavor and actually has some health benefits.  Smoked Salt has been a favorite ever since I used it for the first time and figured out how to smoke it myself.  And so on and so forth.  If you're just using plain salt and you're happy with it, that's cool.  However, step outside the box and give some of the great salts from around the World a try.  I currently have six different salts next to my cook top.  Each with its own purpose.

Yard Long Beans...Confit

I've seen these at the Farmers Market and have been curious.  So I asked Wendy Crager, the Farmer who produced these, exactly how to cook them.  With that twisted little smile she gets sometimes, she said "Some Chefs braid them together and roast them".  I thought it was a fine idea and decided to do just that.  However, when I got home I tasted a bit of the fresh, uncooked bean and realized that there just wasn't a lot of flavor to this variety.  Nothing to do with it's growth or production, I know, because Wendy Crager and Brian Hager grow incredible produce.  Nonetheless, I had to do something to punch this bean up a bit and, whenever you're in a bind for flavor, Bacon Fat is always the Designated Hitter.

Confit is a term for immersing something in a substance to either preserve it or flavor it.  When the term comes up, it usually means something that has been slow cooked in some form of fat and that is precisely what I did.

3, 6, 9, or some other multiple of three Yard Long Beans
2 cups Bacon Fat
1 cup Olive Oil
8 whole Garlic cloves
10 black pepper corns, crushed
Butchers Twine

Start by placing all the fats, garlic, and pepper in a small sauce pan and setting it to the lowest heat possible.  You're flavoring the oil and the last thing you want this to taste like is burnt garlic.  Let this go until the garlic cloves are a golden brown.  Strain out the garlic and pepper and set aside for some other wonderful use.  I suggest whipping them into about 2 sticks of butter.

While you're waiting for the garlic to be done, tie together three beans and braid, being careful not to break them,  When you reach the bottom of the braid, tie off with more twine and trim excess bean from the end.  

When done, turn the fats back on the lowest heat possible, wind beans into coils to fit in the pot, and fully immerse then.  You may need a ramekin or something similar to weigh them down.  Allow to steep in the fats for about 30-40 minutes then turn off the heat and let them steep for another ten minutes.  When done, flash them on a VERY hot grill until some char marks begin to appear.  Finish with salt, as mentioned above, and enjoy.

It's hard to see the Yard Long's but they're there.
In the past year, I've really gotten away from being a fancy-ass and have stopped suggesting wines to go with what I serve up.  I thought it was a bit pretentious and I'm about good times and good food.  However, I'm about to make a suggestion that might seem snooty to some and is sure to piss off any wine buff who knows their stuff:  No matter what you're drinking with this meal, pour a small glass of high quality Port and have it handy.  Port is a dessert wine and meant to be enjoyed after a meal (if you read up on it, there's actually quite a bit of ceremony that goes along with it).  However, it's sweet and sturdy flavors just go so well everything I've presented here that I couldn't help but suggest it.

And after dinner, you can have another small glass of Port to stand on tradition.  Then, if you go outside for the after dinner stogie, you can take a small glass of Port with you.  When returning to the house after savoring your carcinogenic delight, have yet another glass of Port to cleanse the palate.   I think you know where this is going.  As Always...................

Party Well, Eat Better
Rob

Sunday, July 15, 2012

24 Hours of Food

Please note that there is something up with Blogger and it keeps blanking out portions of what I write without much of an explanation.  Also, I'll warn you right up front:  This is possibly the longest post I've written in quite some time.  Buckle up.

Imagine Keifer Sutherland cooking and drinking too much instead of saving the World from this threat or that terrorist.  That's about how the last 24 hours have gone. It all started with an innocent visit to the Farmers Cupboard in Carrollton, GA and the purchase of some of the largest, most beautiful Chuck Eye Steaks I've ever seen.  It's always good to know the Butcher.

Gina and I used to hang out at the La Fiesta on Hwy 61 with some old friends on Fridays.  We would drink, eat, laugh like idiots, and just have a good time.  The tornado hit La Fiesta a few years ago, friends have moved away, and Mr. Vicente no longer makes the best Sangria in town (now that's a recipe I want) and as Gina and I are emailing as we do on Fridays, I mentioned how I've been kind of bored with the same old routine and how much I missed the "Old Days".  One phone call leads to another and all of a a sudden we're invited to our good friends Troy and Russells house (you will remember them from the post Backlash and the Invincible Drunk).  Off to Farmers Cupboard...again... I go to get some Chicken Sausage, Sweet Italian Sausage, Kalamata Olives, Green Olives, and a few other things not counting the stop I made there only a few hours earlier.  The Spontaneous Dinner Party was on and here were my contributions.


Sausage Calabrese Skewers

1 lb Chicken Sausage
1 lb Sweet Italian Sausage
Handful of Kalamata Olives
Handful of Green Olives
Red Pepper Flakes
Dried Basil Flakes

Fry sausage as one normally would until done.  Place in the fridge until cool.  This is important as the sausage will not cut properly until the proteins can cool and bind.  Also, save the pan you used to fry as the drippings will be used in a minute.

When the sausage is cool, cut into medallions about 1/2 inch thick.  For the chicken sausage, alternate sausage and Kalamata Olives on a skewer until there are 4 of each on a skewer.  For the sweet Italian sausage do the same with he green olives until there are 4 of each on a skewer.  Grill until the olives are wilted and the sausage has some nice brown grill marks on it.  Sprinkle with red pepper flakes and dried basil as a finish.

**I just want to throw a word of caution in here:  If you have friends that invite you over to hang with their friends and their friends decide that Lemon Drops will be mixed by the quart, be very careful of where you tread.  Again, I'm just stating something here.**

So I talked to the Butcher at Farmers Cupboard, as mentioned, and asked that he call me when he got in some Chuck Eye Steaks.  If you read over a few of my past posts, you'll see that Chuck Eye Steaks rank way above Ribeye's in my book. They are a tender, marbled, and lovely cut of steak that costs half what a Ribeye does, its just as tender, and the really groovy part is that no one is paying attention to this cut yet as they are caught up in names and what other people say they should eat.  It's really easy to get your hands on them if you just ask.

Anyway, here's what I decided to do with them.

Bombastic Balsamic Steak

2 lbs. thick cut Chuck Eye Steaks (2 steaks, about 1 lb each) Cubed
1 cup Balsamic Vinegar
1/2 cup Organic Cane Juice Sugar
1 tsp fresh ground Black Pepper
1/2 tsp granulated Garlic
12 strips high quality Bacon
Salt, Pepper, Granulated Garlic for Steak Seasoning
Sausage drippings from before

Start by deglazing the sausage pan with a bit of water and boiling that down to a thick, sausage flavored mass that is just thin enough to pour.  Add the vinegar and reduce by half (reduce to 1/2 half cup).  Add sugar, pepper, and garlic and simmer until the flavors combine.  Fry off bacon until crisp and throw everything into a blender and puree until a fine, bacon flavored, sweet, Balsamic glaze is created.

Cut steak into 2" cubes and season with salt, pepper, and granulated garlic and let sit for just a few minutes to season.  Over medium coals, grill steak cubes to rare and immediately toss in the Balsamic mixture and return to the grill to set the flavors.  If there is any left over, coat it again and repeat until you reach a nice, medium rare finish on the steaks.

Getting Over It.

Yeah, so we decided to stay a little later than planned at out friends house and there were...maybe...one too many Lemon Drop Shots to be enjoyed.  It's cool.  I'll just set my alarm for "Way Early",  get up, and make everything happen......Yeah, Right.

The alarm goes off at 5:45am and I hit the "Go to Hell" button and what seemed like a few seconds later, Gina tells me it's 7:00am and for the first time in my life, I don't freak out, I get up, and proceed as if nothing is wrong...which, of course, it is because I'm behind schedule.

Paul and Terra Feather.  Cotton Mill Farmers Market Managers
Thinking that I'm going to be traveling light this time, I pack what gear I think I need and head off to the Cotton Mill Farmers Market.  It's funny, the sense of confidence you have when you leave knowing you've packed everything and then the complete turn around in your attitude when you realize you've forgotten key things and you can't go back for them.

After this, I have to admit, things ran almost like clockwork.  Since this was my last scheduled event for the year, I wanted to make a show of it by inviting a few friends out to play guitars and sing for the Market crowd.  Unfortunately, one cancelled and the other was late, but it's all good.  Terra Feather, who runs the Cotton Mill Farmers Market, invited a Bluegrass quartet out and they took over after a while.  Market friends all around, music in the air, fresh vegetables in abundance....and 5 pounds of dead animal just for me. I'd like to say I was spontaneous, but I had been planning this for weeks.

Beef & Lamb Gyros with Tzatziki Sauce


I have to open by saying that I enlisted the help of Shonna from Fire & Iron Bakery in Rockmart, GA for the pitas.  She whipped up 30 Pocket Pitas and did them for me at cost.  I also need to mention that this event was planned around the West Georgia Locavore Challenge, which I have talked about all month. The aim was to have everything possible come from with 50 miles of Carollton, GA.  With the exception of the wheat for the pitas and the spices in the meat, we did just that.  The names are mentioned with the ingredients.

Gyro Meat

3 lbs Grass fed Ground Beef (Dennis Farm of Alabama)
2 lbs. Lean, Local Lamb (Mugg Family Farm)
1 tsp each of the following:
     Marjoram
     Black Pepper
     White Pepper
     Allspice
     Cumin
     Oregano
1-2 tsp Sea Salt

Whats in the meat mixture is less important that how you process it.  This is one of the few recipes I will post where I'll say to remove as much fat as possible.  This is about the proteins and their ability to bind to one another.

Picture courtesy of Whole Grains & More
Cut all meats in 1" cubes and place in a food processor large enough to handle the quantity.  Grind all spices to a fine consistency and add to the meat.  Pulse several times until the cubes begin to disappear and then turn it on and let it run.  Grind until you reach the consistency of hotdog meat or close it.  You want to take this past the regular ground meat stage.  Use enough ground meat to fill a standard loaf pan half full.  There should be enough meat to do this twice.  Cover with foil and chill for about 10 minutes to let it "Rest".

Now, there are two methods you can use:  The first is to bake the loaf in a water bath for about 30 minutes at 350 until the loaf sets.  Or, you can VERY GENTLY heat the loaf pan on a stove top burner until the same thing happens.  Either way, once the loaf has set, place in a non stick pan and over medium low heat, continue to cook for about 15 minutes per side.  Also, you will want to place some form of weight on the loaf as it cooks to help get excess liquids out and to help it maintain its shape.  I used the loaf pan with a few heavy, ceramic dishes placed in it.

When fully cooked, wrap in foil and place in the fridge for about an hour or until its cooled almost completely.  This is going to allow the proteins to bind together making a loaf that will be easily sliced, which is exactly what you're after.  Using a meat slicer (I am lucky enough to have one) or a very sharp knife, slice as thin as possible.  Serve on a warm pita with thinly sliced Red Onions, Tomatoes, Feta Cheese, and.......

Tzatziki Sauce

So simple, I'm almost ashamed to post it.  However, you can't have Gyros without Tzatziki.

2 cups Plain Greek Yogurt (Atlanta Yogurt Company)
1/4 cup finely diced Cucumbers (The Garry Farm, Bowden, GA)
2 tbsp Red Wine Vinegar
1 tsp finely chopped Fresh Mint (Crager/Hager Farm)
1/2 tsp fresh Cracked Black Pepper
1/2 tsp Sea Salt

Mix all ingredients and let stand for about an hour before serving.  That's all there is to it.

A quick word about Yogurt:  Greek Style is all the rage right now because its thicker than standard yogurt and for the Tzatziki Sauce, you want thick yogurt as the cucumbers and the vinegar are going to thin it out a bit.  If Greek Style isn't available or you happen to have regular yogurt around, tie a cheese cloth over a large container, pour yogurt in the cloth, cover, and let stand overnight.  This will drain a good bit of the liquid away, leaving a nice, thick yogurt for sauce.

I returned home, exhausted, and took a quick nap.  As always, I woke up thinking of what I had in the kitchen.  As always happens, when someone does any cooking for the Cotton Mill Farmers Market, the vendors are very generous and they always give me plenty of good things.

Having fresh tomatoes, green and red peppers, and a few other things around including a fresh quantity of Merlot, I decided that after 25 years of living without my Grandmothers Chili Sauce, it was time to get to work.  Base recipe in my head, the smells and tastes of what I remember, and five hours of constantly stirring this delicate yet bold mixture rewarded me with a Chili Sauce that is almost, if not entirely, perfect in its portrayal of what Grandma used to make.  If you want that recipe, get a handful of friends, some large sticks and pipes, and a team of wild horses...because there's no way in Hell this recipe leaves me without a fight.

Today, I will relax, write some more, and have a hot dog topped with the only thing a hot dog needs.  Maybe I'll have more wine too.

Party Well, Eat Better
Rob

Friday, July 13, 2012

Getting it Wrong and Getting it Right


There's a quick recipe below.  I have a little something to say first.......

As you may or may not have noticed, I have mentioned that the West Georgia Locavore Challenge is underway.  Knowing that I have people all over the Country reading this Blog (I hope) you can find out more about it here: http://www.westgalocavore.com.  Take a minute to read over whats going on there and then read this:  http://grist.org/locavore/local-haterade-authors-say-locavores-do-more-harm-than-good/

If you don't feel like investing the time in reading those, let me sum up very quickly.  The West Georgia Locavores (and I include myself among them) believe in eating as much as possible of what is grown and produced locally.  However, Pierre Desrochers seems to think that trying to remain as "Local" as possible is actually more destructive than mass produced foods that come from all over the World and, among other things, increase the problems of Food Safety.  Umm...What?!?!?!  


Whether you agree with High Production Foods or not, whether you live Organically or not, you have to realize that not only are you getting top notch ingredients but your also supporting a Local Economy.  A great deal of the recipes I have posted for over a year call for Organic ingredients and the majority of what I list in my ingredients, I source as close to home as possible and of that, I talk to my "Suppliers" and look them in the eye every time I buy from them.  I say "Suppiliers" but I really should be saying friends.  Sure, some of them are a little more stuffy than others, but we all live for the same thing:  Local, organic, and really, REALLY, Good Food.  Not to mention, when you hear numbers about National Unemployment Rates, jobs created, etc. those aren't just numbers.  They are people and the money you spend at Farmers Markets keep people working and keep money in your Community.


If you haven't visited your local Farmers Market, you need to and you need to do it more than once.  You'll notice a lot of the same faces week to week and you'll also notice how committed these people are to doing what they love.  So committed, in fact, that they have dedicated their lives and fortunes to it.  I've gone into detail about how this effects the local economy (check out the post Political Food).  Take the time to check out the links provided and form your own opinion.


You do come here for recipes, so without further delay..........


All Things Teriyaki


So, during the West Georgia Locavore Challenge and since the July 4th holiday was upon us, I decided to grill, as most Americans do, but I had the chance to get my hands on some locally grown and organic Japanese Eggplant, Zucchini, Grass Fed Beef, and Free Range Chicken.  What to do wit hall of this came to me very easily:  Put it on skewers.


This done, I revert to my very basic knowledge of Teriyaki Sauce and I decide to wing it.  I knew there were a few basics of Teriyaki and I decided that adding what I thought was traditional ingredients would do the trick.  This is what I came up with:


Teriyaki 


1 bottle Soy Sauce
1/2 cup Organic Molasses
1/2 cup Honey
2 Tbsp. finely ground Black Pepper
2 Tbsp ground Fresh Ginger (please, PLEASE, use fresh Ginger)
1/2 cup Good Quality Spiced Rum
2 cups Ice
1 can Coca Cola


In a medium sauce pan, add Soy, Molasses, Honey, Black Pepper, and Ginger bringing it to a light simmer over medium heat, turn off, and let sit for at least 30 minutes.  Seperately, in a large glass, add Ice and pour Spiced Rum over it, add Coca Cola and give a slight stir.  Set off to the side and sip occasionally while you wait.  I told you I was going to tell you exactly what I did.


The benefit of this recipe is that it is easily expandable (including the Rum and Coke) and keeps for about a month in the fridge (unlike the Rum and Coke) and has all of the properties of being able to be canned and stored for extended periods..  


I let the meats sit in the Teriyaki for about an hour, which required another Rum and Coke, but you will find that the longer you let meats sit, the more tender they will be.  The veggies can take a short soak or even a quick toss and be just fine.  


For the benefit of hindsight, I decided to look up an online recipe or two when I was done.  Turned out to be quite close to what I had done and I even added a few things that weren't listed in most recipes.


I realize I haven't provided as much in the Recipe Realm as I usually do but I wanted to make a point about locally grown foods.  There are a ton of benefits to supporting your local farmers and the least of them is that you end up with very high quality ingredients for your table and your family.  I know I have a few Bloggers that follow me and I know at least one or two of them believe in cooking what's in season and what comes from nearby.  I you don't believe me, if you don't believe the cooks that I know that support this mindset, you at least have to realize that for tens of thousands of years, mankind only ate what was close enough to find, harvest, plant, or hunt.  25,000 years of Human Evolution have gotten you this far.  How much harm could you be doing to your local economy and yourself to continue that tradition?


As Always....
Party Well, Eat Better
Rob